Sunday, February 21, 2010

the purple knifty knitter loom

I started a new project to learn how to double knit using the purple Knifty Knitter long loom.  I found an excellent free Classic Stripes Scarf pattern over at DA Looms that Isela so graciously donated.  It is perfect for learning how to knit on the long loom.  The pattern includes great photos and instructions on how to wrap the long loom for the stockinette stitch, how to change colors, how to finish the beginning edge, how to bind off, and how to add fringe.  This will be a good first long loom project, and I'm enjoying how fast you can wrap and knit on this loom.  I like that there is no wrong side on this scarf.  It's turning out wonderfully thick and soft.   

rib brim hat


I first saw this rib brim hat at a blog called


A Knifty Knitter's Journal and wanted to loom one also.  A crown shaping method was used instead of the gather method, and I wanted to learn how to decrease, so I thought this would be a good project, plus I really liked the looks of this hat.

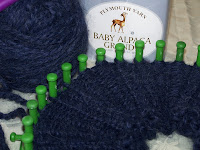
I loomed this hat on the KK green loom using Baby Alpaca Grande by Plymouth Yarn.  Navy was used for the main color, and grey was used for the stripes. 

Here is the pattern for anyone who would like to loom this hat:

Cast on 36 stitches using the crochet cast on method.
Brim: Using the knit stitch and the purl stitch.  Knit 2, purl 2 every row until brim is 4 or 5 inches, approximately 26 rows.
Body:  Using the knit stitch, knit every row with main color for 5 rows.  Switch to stripe color and knit 2 rows.  Knit 2 rows with the main color. Switch to stripe color and knit 5 rows.  Knit 2 rows with the main color. Switch to stripe color and knit 2 rows.  Switch to main color and knit the remainder of the body for 3 inches or approximately 16 rows for medium size.  Body of the hat should be a total of 26 - 27 rows.
Crown: Using stitch markers, divide the loom into 4 sections of 9 pegs each.  Number the pegs 1 - 9 in each section.
Knit from peg 1 to peg 9 and then turn at peg 9 and knit back to peg 1 as in a flat panel.  Remove the loop from peg 3 and hold on to the loop (I slip the loop onto a crochet hook).  Move the loop from peg 2 over to peg 3.  Place the original loop from peg 3 and place it back on peg 3.  You now have two loops on peg 3.  Move the loop from peg 1 to peg 2.  Remove the loop on peg 7 and hold on to the loop.  Move the loop from peg 8 to peg 7.  Place the original loop from peg 7 and place it back on peg 7.  You now have two loops on peg 7.  Move the loop from peg 9 over to peg 8.  You now have 7 loops on the pegs.  Knit two rows (knit the two loops as one) from peg 3 to peg 8, turn and knit peg 7 to peg 2.

Remove the loop from peg 4 and hold loop.  Move the loop from peg 3 over to peg 4.  Place the original loop from peg 4 and place back on peg 4.  Move the loop from peg 2 over to peg 3.  Remove the loop from peg 6 and hold loop.  Move the loop from peg 7 over to peg 6.  Place the original loop back onto peg 6.  Move the loop on peg 8 over to peg 7.  There are now 5 loops left.  Knit two rows (knit the two loops as one) from peg 4 to peg 7, turn and knit peg 6 to peg 3.

Continue to decrease stitches until you have one loop left.  Cut 12" from the working yarn, take the last loop off and pull the 12" yarn through the loop with a crochet hook. Tighten.  Repeat decreasing on remaining 3 sections until you have 4 triangles.  Stitch the 4 sections together using the mattress stitch.

Looming Through the Psalms:
"It is God who arms me with strength and makes my way perfect.  He makes my feet like the feet of a deer; he enables me to stand on the heights." Psalm 18:32, 33
 

Tuesday, February 16, 2010

shaping a hat crown

I've been working on a practice hat to learn how to shape the crown instead of using the gather method.  Since there are 24 pegs on the KK blue loom, I sectioned the loom off into four sections of 6 pegs using stitch markers.  In the first photo there are two triangles after decreasing the stitches. 

The hat is taken off the loom with four triangles that 
will need to be stitched together to close the crown.
 
This is what the completed practice hat looks like 
after the triangles are stitched together. 
Isela on her Purling Sprite Blog has a tutorial on
this decreasing technique that I found helpful.
 
A video of the mattress stitch used to sew the seams 
together can be found here at KnittingHelp.com.

Tuesday, February 09, 2010

on the loom again

There's something new on the loom again.  I thought I'd dust off my Knifty Knitters and do some experimenting.  I have to say, this Alpaca wool is luxurious and wonderful to work with.  What could this new project be?  We'll see...                                                                                                   
                                                                                                           Almost ready to remove from the loom.
 
Where there's one project on the loom, you can be sure there's another one close behind.  I'm making this item on my CinDWood adult 1/2" gauge hat loom (51 pegs).  I wanted to see how the exact same project turned out on a smaller gauge.  The Knifty Knitter green loom has a 3/4" gauge.  

Friday, February 05, 2010

crocheted blanket completed

I'm not sure how procrastination can get the best of us at times, but almost a whole year has passed since I completed this blanket. I enjoyed crocheting this blanket that is now affectionately loved by two precious little girls. I haven't been looming or crocheting since I completed this project, but the desire is beginning to manifest to pick up the looms and hooks and get busy with these hobbies again. I'd like to get into needle knitting as well. One of my aunts got me started when I was a girl, so it would be nice to become reacquainted.

Looming Through the Psalms:
"And I--in righteousness I will see your face; when I awake, I will be satisfied with seeing your likeness."
Psalm 17:15